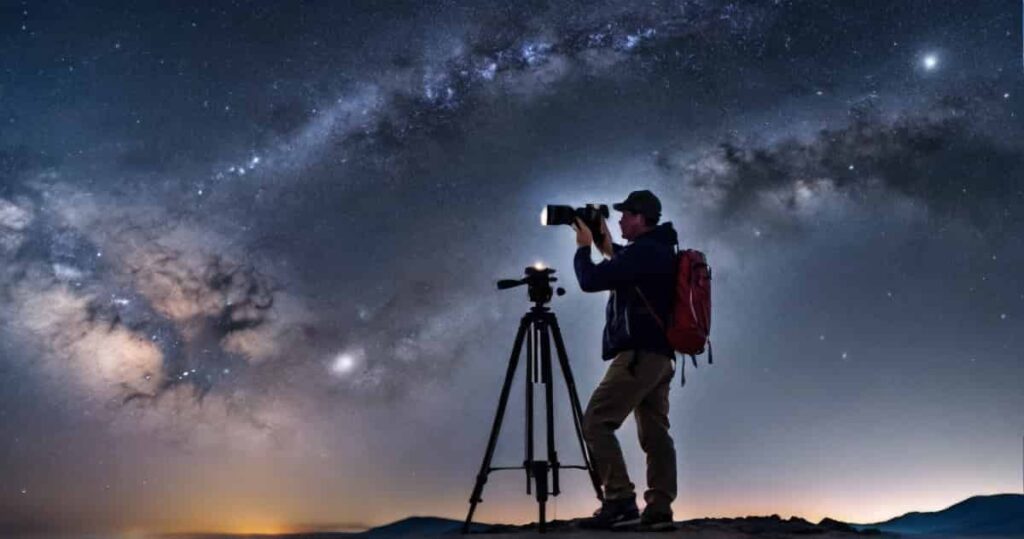
Astrophotography is all about capturing breathtaking images of the night sky. It is not just for professional photographers. Anyone with a camera and curiosity can join the fun. In this guide, we’ll briefly explore the astrophotography tips for beginners and understand why snapping pictures of the stars is so captivating.
Now, you might wonder why you bother with astrophotography. Well, the night sky is a canvas of wonders. Capturing the beauty of the sky allows us to appreciate the vastness of the universe. These astrophotography images act as a personal link to the cosmos. They permit us to see the stars and celestial happenings in ways impossible to the naked eye. Whether an astonishing photo of the Milky Way or a close-up of a moon, these pictures transform into openings to the universe. They offer a feeling of amazement and awe, reminding us of the extraordinary extent and beauty beyond our daily lives.
Different Types of Astrophotography
Lunar Photography
Lunar photography involves capturing detailed images of the Moon’s surface. Photographers zoom in on various lunar features like craters, mountains, and other surface details to showcase the Moon’s unique topography.
Planetary Photography
In planetary photography, the focus is capturing images of planets within our solar system, such as Jupiter, Saturn, or Mars. These images often highlight distinct features like planetary rings, atmospheric bands, or surface details, providing a close-up view of our neighboring planets.
Star Photography
Star photography centers around individual stars or groups of stars in the night sky. This type of astrophotography captures the beauty of star patterns and arrangements, revealing the intricate tapestry of the celestial heavens.
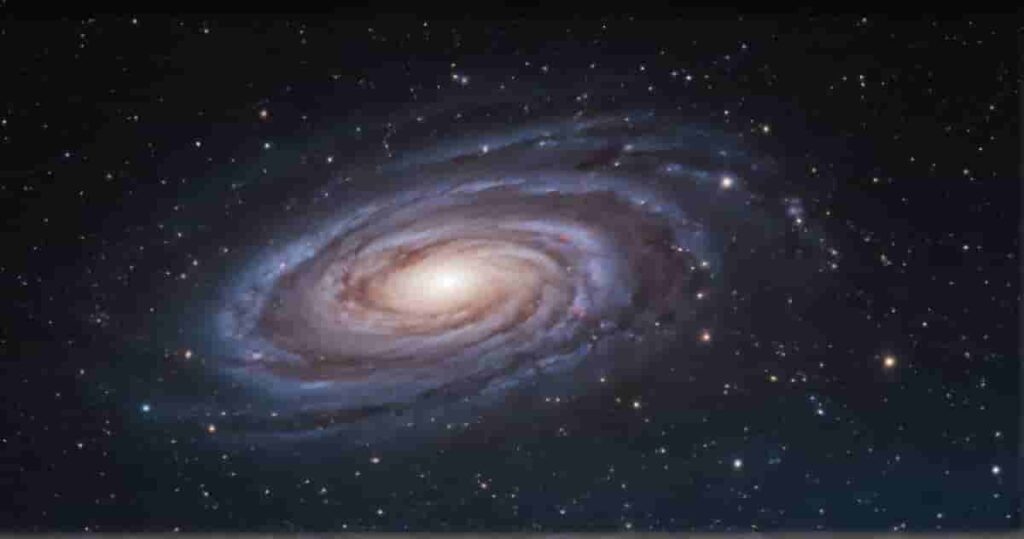
Deep-Sky Photography
Deep-sky photography aims to capture distant celestial objects beyond our solar system, including galaxies, nebulae, and star clusters. This type requires longer exposure times to reveal faint details, offering a glimpse into the vastness of the universe.
Milky Way Photography
Milky Way photography involves capturing the luminous band of our galaxy. Often done in dark locations to reveal the galaxy’s brilliance, this astrophotography provides a stunning view of the Milky Way arching across the night sky.
Time-Lapse Astrophotography
Time-lapse astrophotography utilizes images taken over time to create a visual narrative of celestial movements or events. This technique is famous for capturing transitions like sunrise, sunset, or the mesmerizing movement of stars across the night sky, offering a dynamic perspective of the cosmic landscape.
Essential Equipment for Astrophotography: What You Need to Get Started?
If you are considering astrophotography, you don’t need a spaceship or a fancy telescope. With the right gear, you can capture stunning night sky images. Let’s break down the essential equipment you will need to get started.
Camera Selection
First things first, you need a camera. But which one is the best camera for astrophotography ? Usually, the two main types are DSLR and mirrorless cameras. DSLR camera is like the classic choice, while mirrorless camera is the newer, more compact option. Both can do the job, so pick the one that suits your preferences. Cameras with full-frame sensors tend to excel in low-light conditions due to their larger sensor size. They provide more extensive photosites to capture increased light. Nevertheless, as megapixel numbers rise and individual photosites shrink, diminishing this advantage, modern crop-sensor cameras prove to be quite proficient in astrophotography. Additionally, they present a more budget-friendly alternative compared to their full-frame counterparts.
Consider the camera’s low-light performance. Whether it’s a mirrorless or digital camera, you want one that can handle low light situations well since you’ll be shooting in the dark.
Lens Considerations
Let’s talk about camera lenses. If you want to capture the big night sky with a wide field of view, choose a lens with a wide-angle focal length. These lenses help you include more stars or shot of the Milky Way galaxy in your photo. Think of them like your go-to cosmic wide-angle lens with a broad view. Conversely, a telephoto lens can be helpful for planetary astrophotography. It can capture detailed shots of the moon, planets, and distant galaxies. It provides a closer view of celestial objects. However, it may not be ideal for wide-field views of the night sky.
Now, onto another important point – fast-aperture lenses. When we say a lens is ‘fast,’ it just means it has a big opening, and you’ll see this as a smaller f-stop number. Picture the aperture as your camera’s eye, and a fast one lets in more light. In astrophotography, where the stars are your leading light, go for a lens with a wide aperture, like f/2.8 or even lower.
Tripods and Mounts
This blog on astrophotography tips for beginners also suggests keeping things steady. Trying to keep your camera steady for the long exposure shots yourself is not doable. Sometimes, there’s no wall to lean on. The tripod’s adjustable head is handy for getting your camera in the correct position to capture the part of the sky you aim for. A sturdy tripod is your best friend in astrophotography. It keeps your camera still during those long exposures, preventing blurry shots. Look for one that’s solid and can handle the weight of your camera setup.
Consider a star tracker mount to take your astrophotography to the next level. These mounts move with the rotation of the stars, allowing you to capture sharp images of stars and star clusters without trailing. Likewise, the equatorial mount tracks with the rotation of the earth. They’re like magic for getting those precise shots.
Astrophotography Tips for Beginners
So, you’ve got your camera and equipment ready, but before you dive into astrophotography, a little planning goes a long way. These astrophotography tips for beginners will help you out.
Location Scouting
The first step is finding the right spot for your test shots. Look for dark sky areas away from city street lights. Light pollution can be a real buzzkill for astrophotography, so the darker, the better. Head to parks, open fields, or any place with minimal artificial lights. Nature reserves or rural areas often provide ideal conditions.
Timing is Everything
Timing matters in astrophotography. Consider the moon phase; a full moon can wash out the stars’ brilliance, so plan your shoot during a new moon or when the moon is less bright. Keep an eye on weather conditions, too. Clear skies are your best friend, but some cloud cover can add drama to your shots. Check the forecast and choose nights with minimal cloudiness for the best results.
Mastering Your Camera and Composition for Astrophotography
Now that you’re set with your gear and a good location let’s demystify the camera settings and composition techniques for successful astrophotography. We’ll keep it straightforward so you can focus on capturing the beauty of the night sky.
Camera Settings
ISO Settings
Start with ISO – it’s like the sensitivity knob for your camera. Aim for a balance between sensitivity and noise. A lower ISO reduces noise but may need a more prolonged exposure, while a high ISO captures more light but may introduce noise. Find a sweet spot for your specific conditions.
Aperture Settings
Think of the aperture as the eye of your camera. A wider aperture, represented by a lower f-number, lets in more light. In astrophotography, this is crucial as stars are your primary light source. Experiment with different apertures to find the best one for your setup.
Shutter Speed
This determines how long your camera shutter stays open. Longer shutter speeds capture more light but can lead to star trails. Experiment with exposure times, considering the Earth’s rotation and the desired effect. A good starting point is around 15-30 seconds.
Composition Techniques
Rule of Thirds
This is a basic but effective rule. Imagine your frame divided into thirds, both horizontally and vertically. Place celestial objects like stars or the Milky Way along these lines or at their intersections. It adds visual appeal and balance to your shots.
Including Foreground Elements
Don’t just focus on the stars; include interesting foreground elements. This could be trees, mountains, or any distinctive features. It enhances the depth of your image and adds interest and context to your astrophotography.
Focusing on Dark
Alright, you’re out there, camera in hand, ready to capture the magic of the night sky. But how do you focus in the dark, and what about tweaking your shots afterward? Let’s dive into the practical side of astrophotography without getting too technical.
Focusing in the Dark
Manual Focusing Tips
In the dark, autofocus can struggle, so it’s time to use manual mode. It allows you to adjust your lens according to various lighting conditions. Use your camera’s live view feature to zoom in on a bright star. Adjust the manual focus until the star appears as a pinpoint of light. This ensures sharpness in your images.
Setting Focus to Infinity
Another trick is setting your lens to infinity for dark frames. Some lenses have an infinity mark, while others may require you to turn the focus ring until it stops carefully. It’s quick and a great way to ensure distant stars are in focus.
White Balance
The astrophotography tips for beginners also suggest setting your white balance slightly cooler for astro photos. However, feel free to play around with the manual white balance options and presets to add exciting tones to your shots.
If you are dealing with some light pollution, tweaking the white balance can make it seem intentional in the photo (try cooling it down for a unique effect). Consider using a gradient filter to reduce noise in a more urban area. For beginners, use the ‘Auto White Balance’ setting and play with warmer or cooler adjustments later when you’re editing to find the look you like best.
Post-Processing
Noise Reduction
After your night of stargazing, it’s time to fine-tune your final image. Noise reduction software can help minimize the graininess in your Astro image. There are various options available, from free tools like GIMP to more advanced software like Adobe Lightroom or Photoshop.
Adjusting Exposure and Contrast
Enhance the details in your astrophotography during post-processing by tweaking exposure and contrast. This step brings out the beauty of the stars and celestial objects. Experiment with these settings to find the right balance for your shots.
Troubleshooting Common Issues
You’ve ventured into astrophotography, but sometimes, things don’t go as planned. No worries – let’s troubleshoot some common issues without delving too deep into the technical jargon.
Dealing with Star Trails
Adjusting Exposure Time
Star trails occur when your exposure time is too long, causing the Earth’s rotation to blur the stars. If you notice trails in your images, try reducing the exposure time. Start with shorter durations, like 10-15 seconds, for great results. And experiment until you find the sweet spot for clear, crisp stars.
Post-Processing Techniques
Light pollution can dim the brilliance of your celestial subjects. While scouting dark areas helps, you can also minimize light pollution during post-processing. Use software like Lightroom or Photoshop to adjust contrast and highlights, helping to restore the natural beauty of the night sky in your images.
Final Words
Astrophotography lets you capture the magic of the night sky. This guide on astrophotography tips for beginners summarizes that astrophotography is not just about taking photos. It is the best way to tell your story under the stars. For novices, don’t stress about having fancy gear. You need your camera and locate a dim place away from urban lights. Be patient. Start small – focus on the brightest star, play with your camera settings, and watch the wonders happen. It is similar to walking into the unknown, viewing the deep sky in a new light. It is about attempting something different. You’re stepping outside your comfort zone and exploring the universe through your camera lens for the first time. So, seize your camera, head to a peaceful spot, and relish the beauty of the stars.


